195Nm Victory!
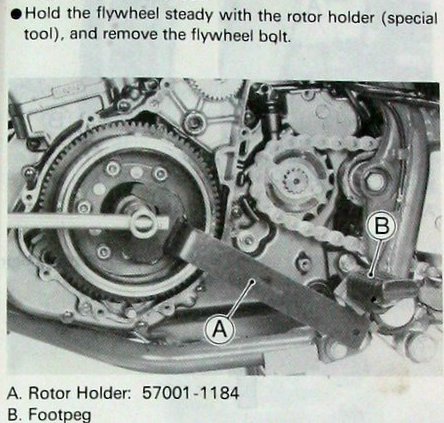 For some strange reason, my brother's Kawasaki KLR Tengai dead-stopped. After starting it again, it made some strange noises. It also had lost a lot of oil somewhere along the way, so we decided to not run it again before we found the cause of the trouble. A few weeks ago we encountered a funny problem, we couldn't loosen the rotor-bolt. In the Kawasaki KLR workshop manual is a picture of a strange wrench to hold the rotor. Ofcourse we're cheap, so we wouldn't spring for a nifty and probably expensive Kawasaki specialty tool for a very old bike which not worth more than the petrol that's in the tank (okay, okay, but you get the point).
 The rotor bolt is tightened to 195Nm. That's a lot of force there, so it's not surprising we couldn't loosen it by holding the flywheeel with our hands. So we set out to create a tool of our own. We even ended up trying to bend an old 32mm Chrome-Vanadium wrench, which resulted in an empty gas can, a very hot workbench and nice colors on the wrench, without it bending even the slightest. We we barely able to heat it to the point it got red-hot, because the metal just conducts the heat away from the point you want to heat.
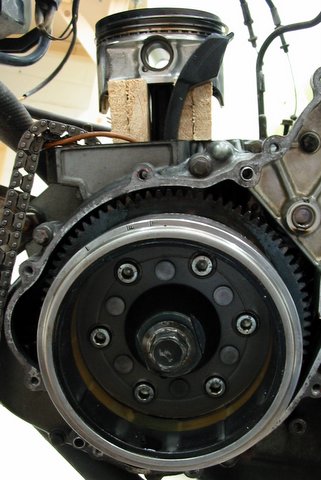 So I started mailing with Vincent, a good friend of mine which happens to be "quite handy" with motorbikes . He pointed out that you could also stop the rotor from turning by holding the piston. Because we wanted to measure the play in the bigend bearing we needed to remove the sleeve anyway, so I immediately went back to the workshop to do this. After removing the sleeve, I could easily make some wood pegs to block the piston. The wood would have to have a big surface and be strong enough to hould the piston, without damaging the piston or the engine casing.
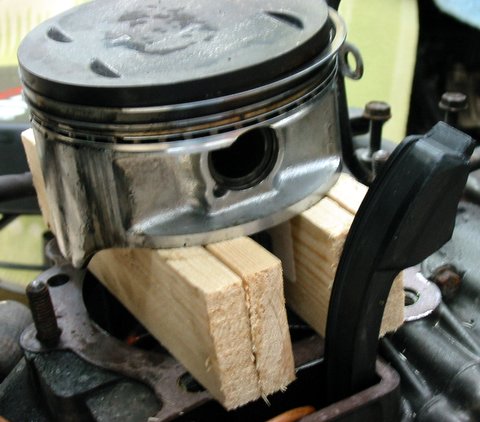 It turned out to work great! I needed to attach a long bar to the socket wrench to be able to apply enough force to the bolt, but in the end I got it! In the picture on the left you can see a detail of how the wood blocks are resting on the engine casing. After loosening the bolt, there was absolutely no visible damage to the piston or the engine. Even greater news is that there is also virtually no play on the bigend bearing, so we don't have to disasemble the crank.
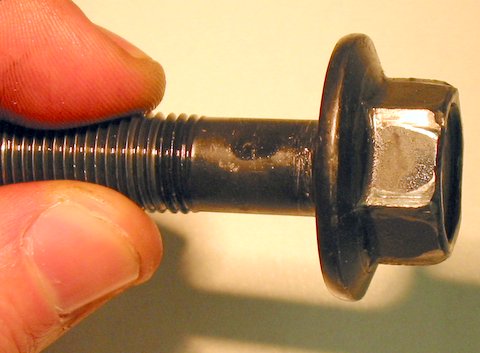 When looking at the bolt, the results of applying so much force to the faces of the socket wrench become visible. We know for a fact that this bolt has been removed once before, so these wearmarks are from tightening and loosening the bolt just two times. I think we can tighten it one more time, but after that it needs to be replaced.