A Bigger Time Machine without Changing History
I had a 160GB drive holding my Time Machine backups. Because I wanted to backup external disks, and still wanted to be able to travel about a year back in time, I bought a 1TB USB disk. Stephen Foskett wrote a great article about how he migrated his TimeMachine backup to a larger disk, but it's lengthy and misses one essential step.
I decided to give you the short version, this blog post describes how I migrated Time Machine to the new disk without losing any data in 11 easy steps.
1. Get a new, big, empty drive with a single Mac Journaled partition on it. Give it a good name so you can keep it apart from the original Time Machine drive.
2. Open the Time Machine configuration screen, and turn off Time Machine.
3. Unmount and remount the Time Machine drive, it should show up as an ordinary orange drive on your desktop.
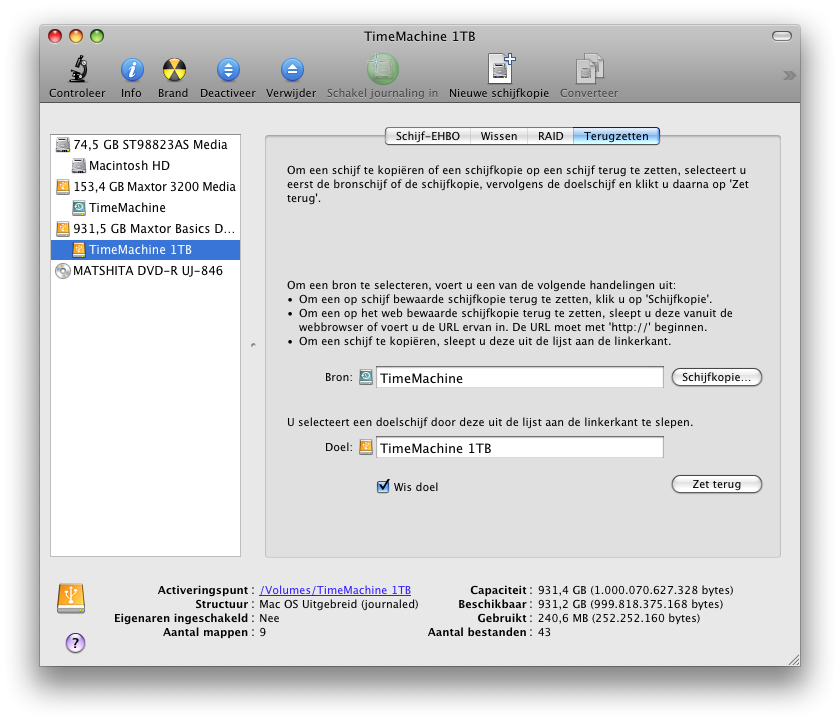
4. Open Disk Utility, and click the "Restore" Tab.
5. [
](copy-timemachine-drive.png)Drag the "TimeMachine" partition which is on the old drive to the "Source" box. 6. Drag the large partition on the new drive to the "Target" box. 7. Select "Erase Target". If you do not check this, the disc copy will fail. This is the essential step I mentioned earlier. 8. Click "Restore", double check the popup warning to see if you are doing the right thing and press "Restore" again. After a number of hours, depending on the speed of your USB hub and the size of the disks, you will see 2 identical drives on your desktop. The new drive should have a lot more space available. In my case, it took 5 hours to migrate 160GB to the new drive. 9. Unmount the old Time Machine drive, physically disconnect it to be sure. 10. Open the Time Machine configuration screen, and turn on Time Machine. 11. In the Time Machine configuration screen, press "Change drive" and select the new drive. You will see the disk icon turn into the green TimeMachine drive icon. You're done.
You can test Time Machine now by clicking the Time Machine icon in your dock and see that you still have all your history. Once you've verified that all your history is still there, you can use your old Time Machine drive for something else (reformat it).
You might also want to check your spotlight settings to not include your Time Machine drive for searching. Because I did not touch the volume name on the new drive, I didn't have to change any settings, but I checked to be sure.
Bonus tip: Now that you've got a large backup drive, maybe it's time to think about backing up your external drives. Make sure all the drives you want to backup are connected, and open the Time Machine configuration screen. Click on "Options..." and remove the drives you want to back up from that list.