Zūmo Mount for Triumph Speed Triple
 The RAM mount coming with the Garmin zūmo's are fine, but I wanted something more elegant to go with my Triumph Speed Triple. This article contains a detailed description of building your own mount for the Garmin zūmo 660. I mounted the zūmo on my Speed Triple, but the mount is universal enough to be center-mounted on any bike which has riser-mounted handlebars.
No guarantees ofcourse, you're on your own from here. Bring your tools and read on.
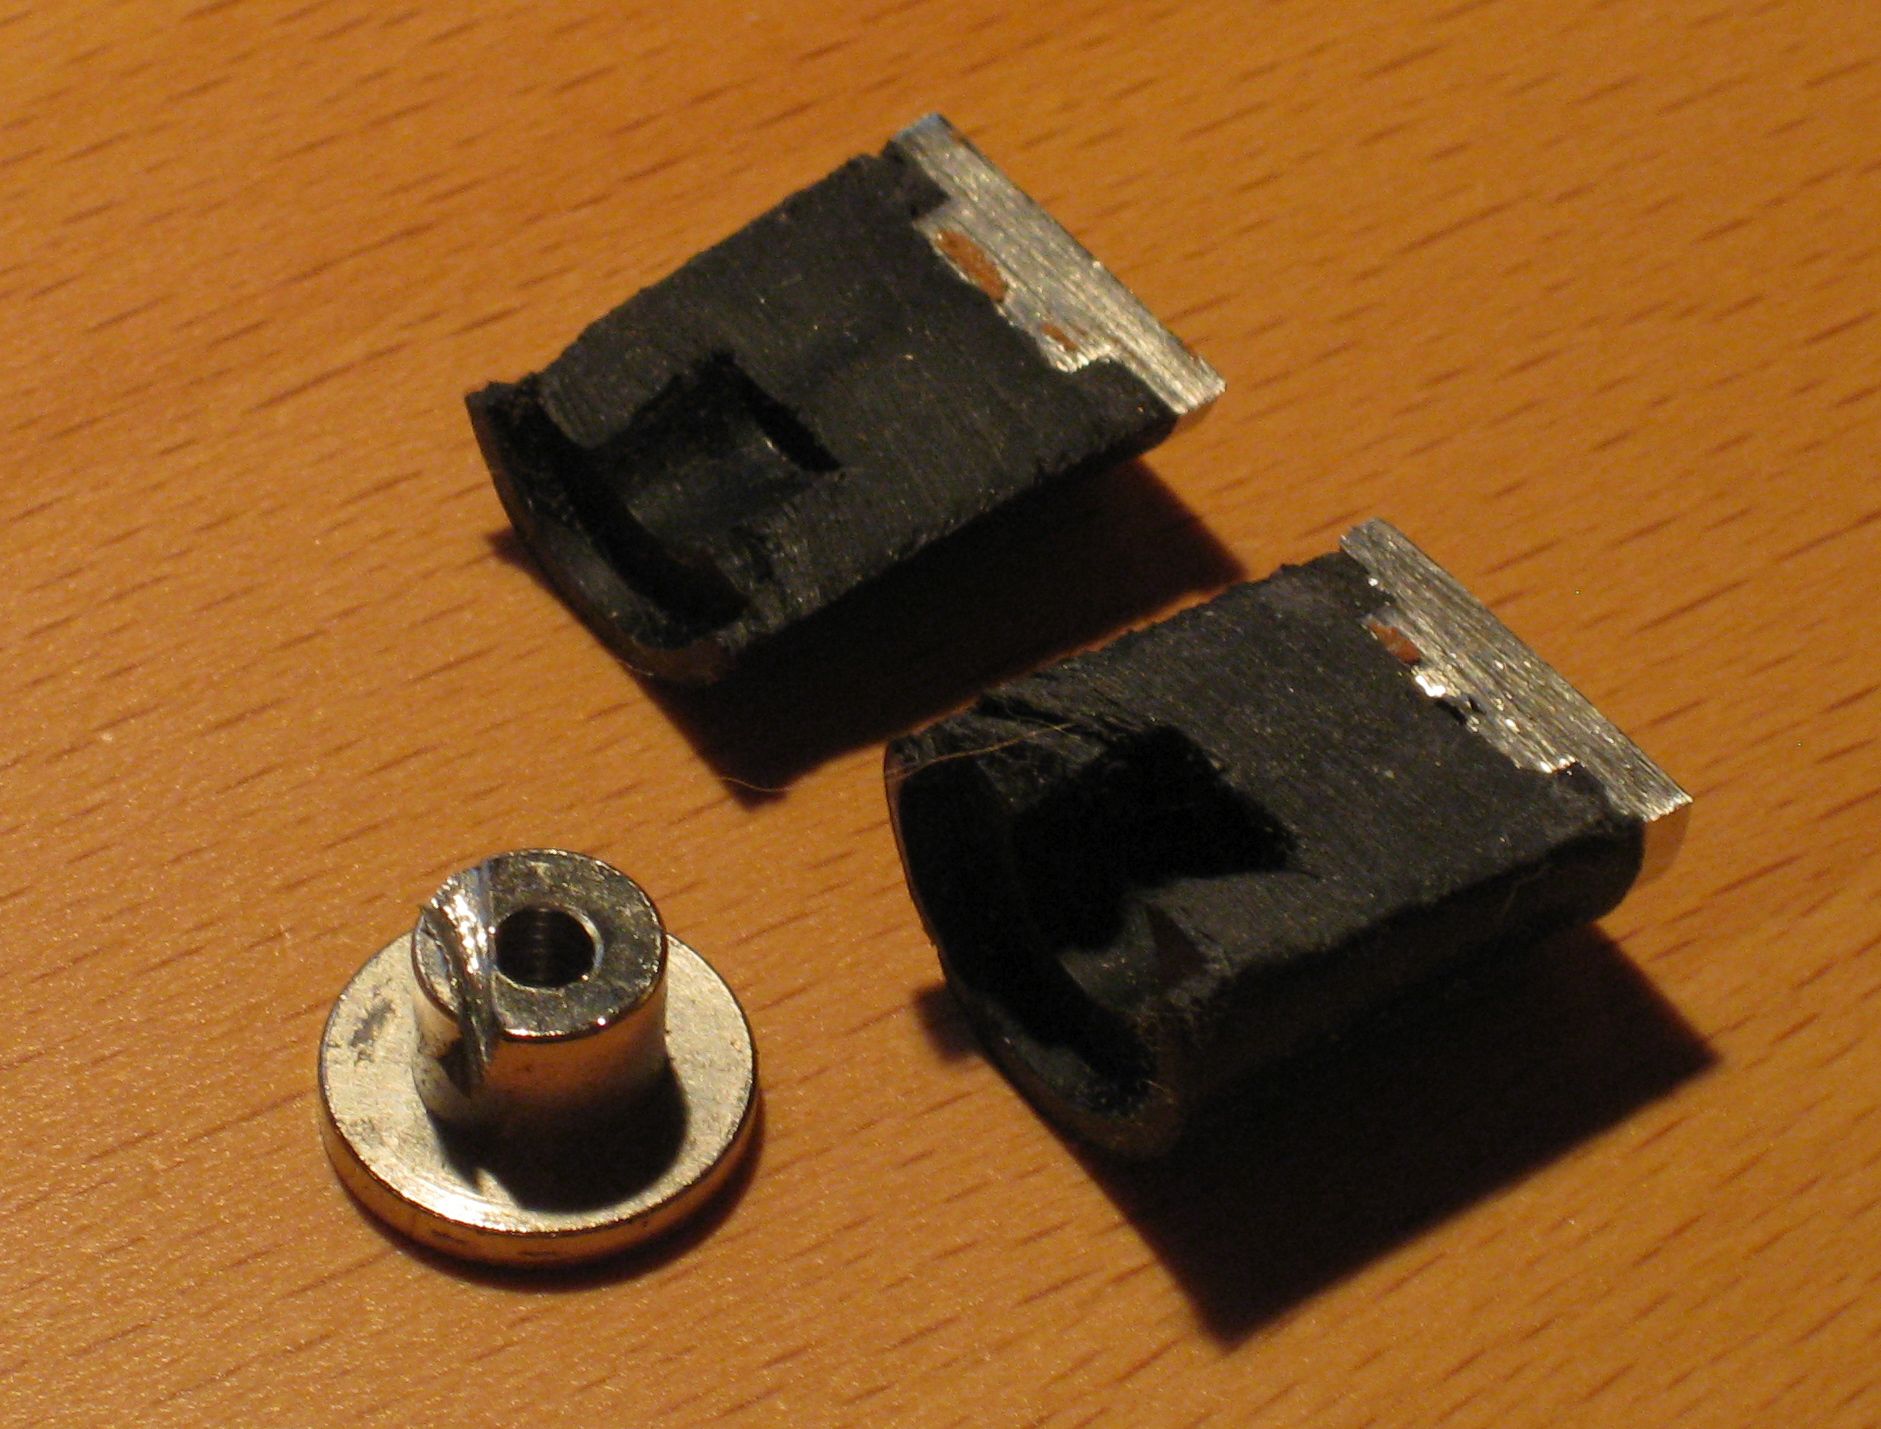 WARNING: When I tried to cut one of these rubbers in half, the bottom disk came loose. It was not as securely glued to the rubber as the top disk. When pulling the zūmo on the mount it does not come off, but if you want to be sure order the Garmin 550 mount rubbers (described in article below).
Stuff you need to buy:
* [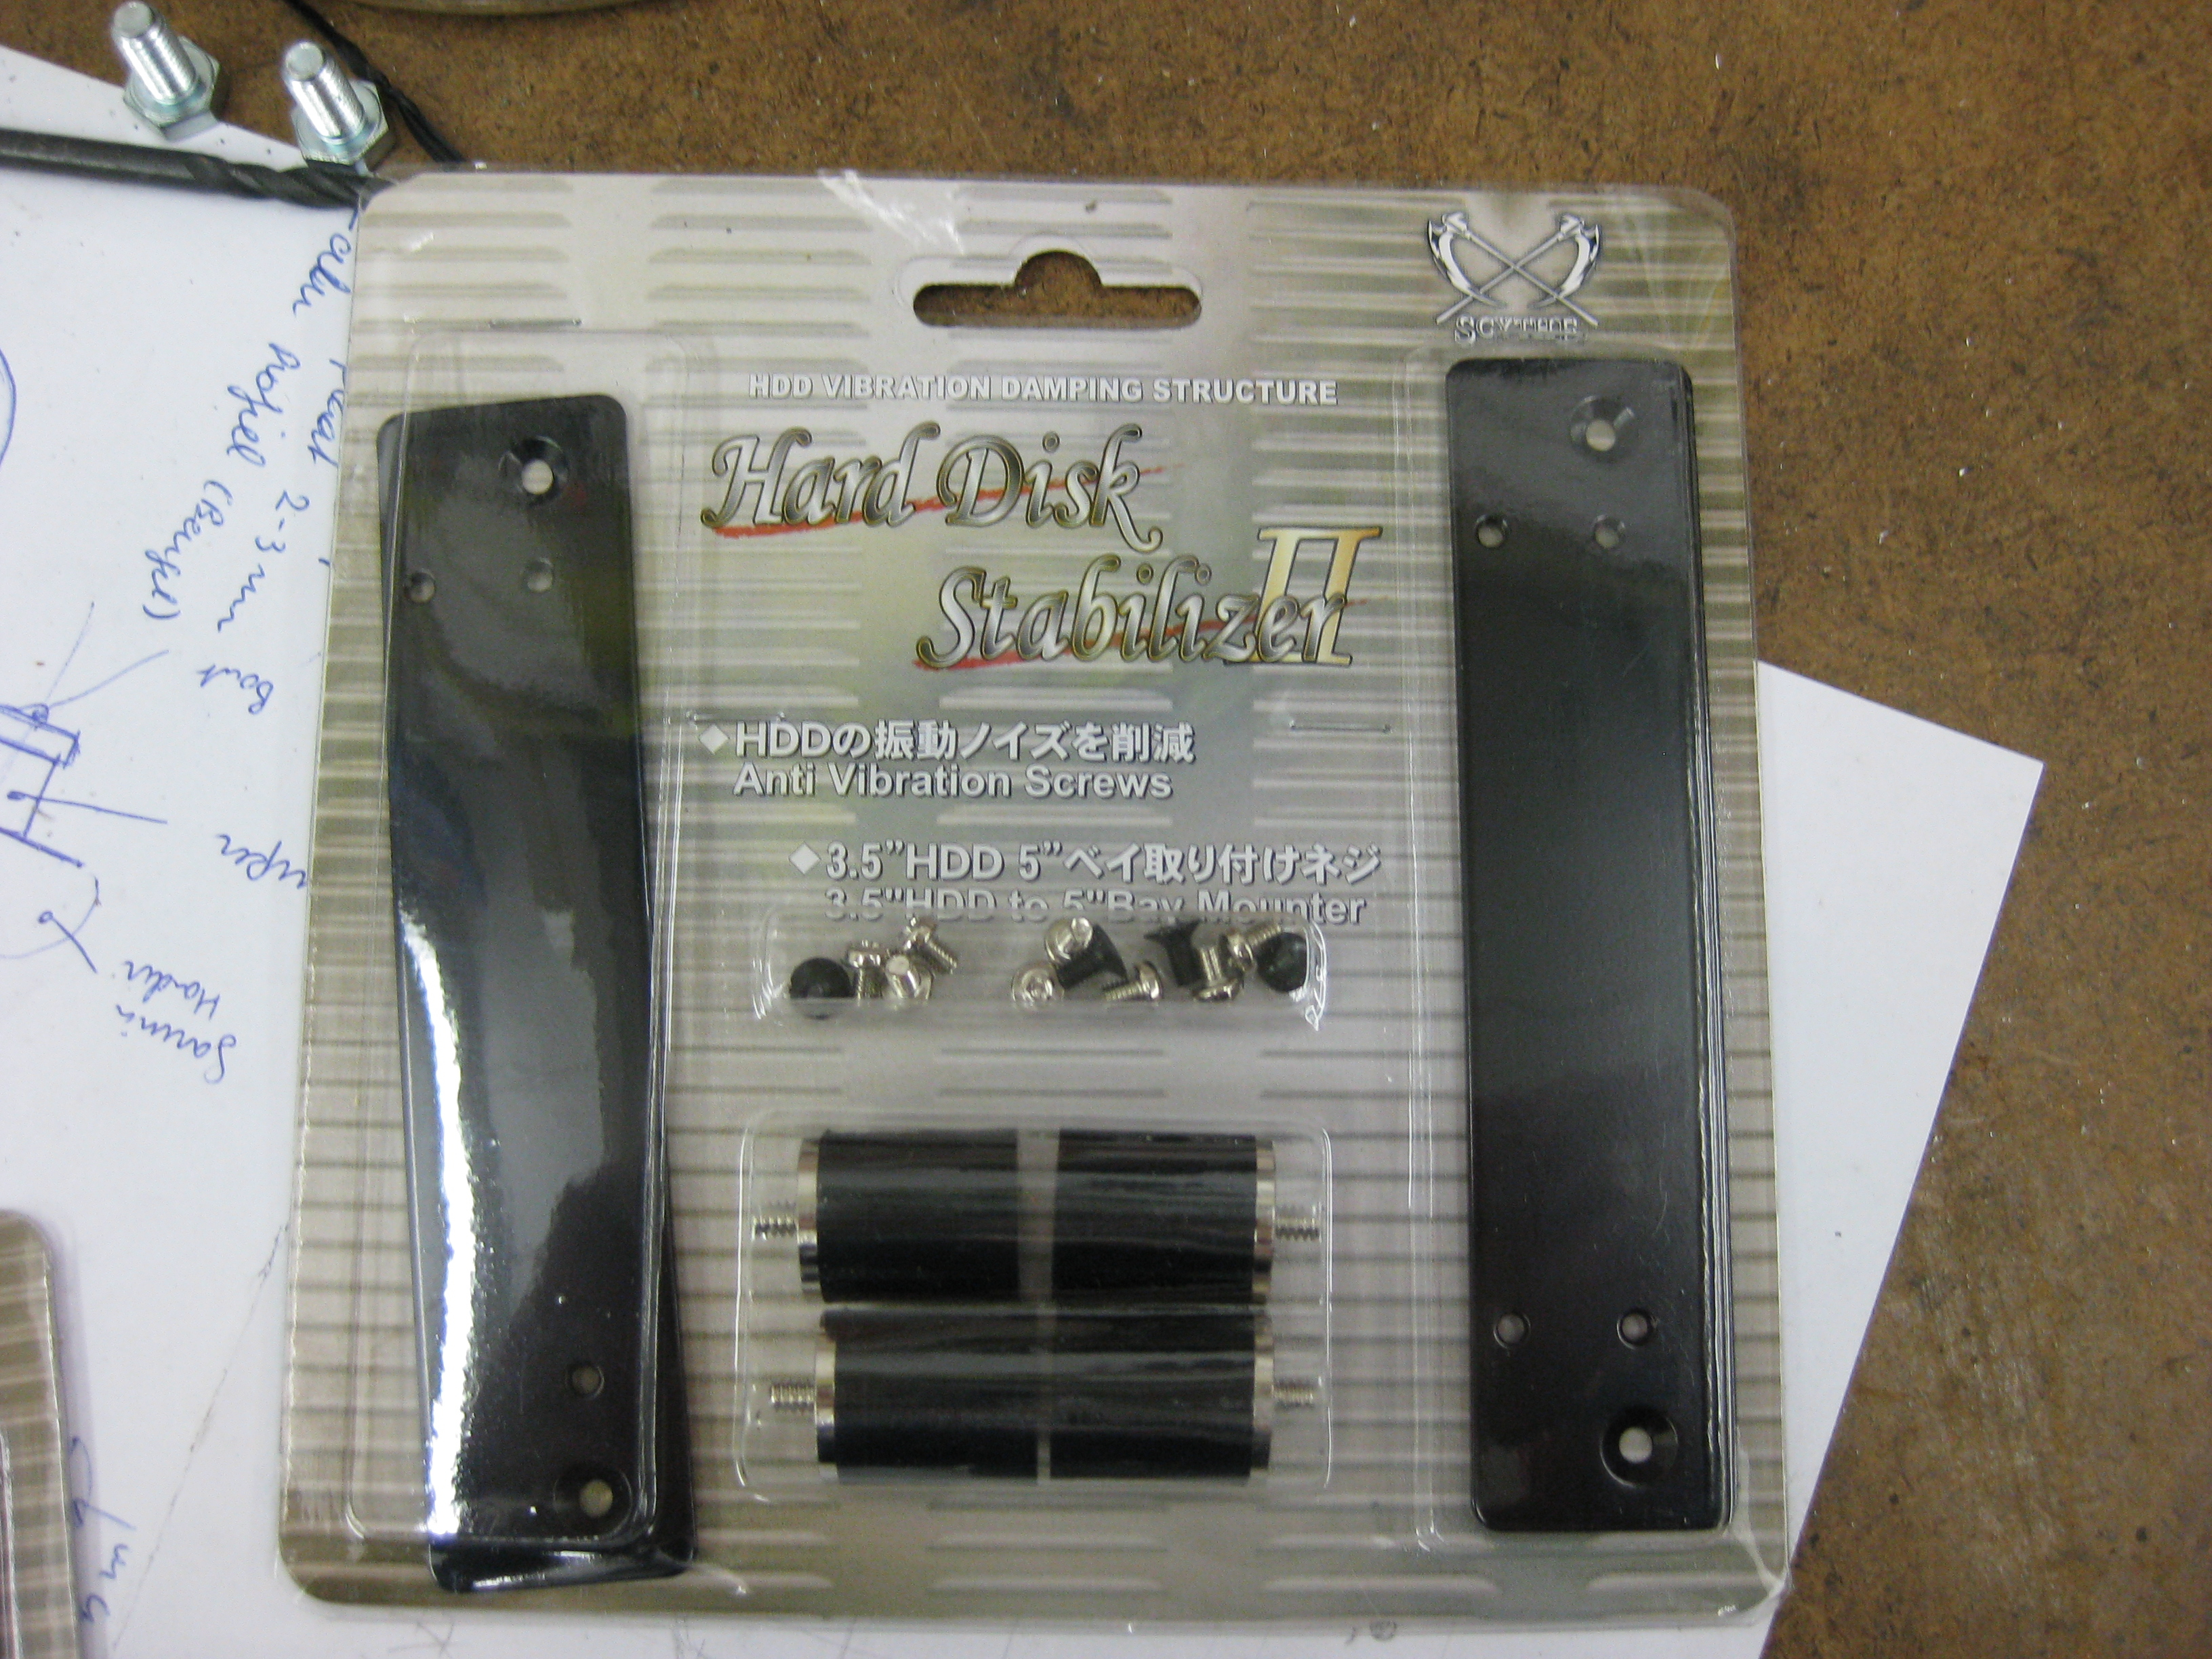
](img_8444.jpg)A scythe "Harddisk Stabilizer II". For more info, see www.scythe.co.jp. I got mine at www.ikbenstil.nl. Buy two of these if you can spare the money, because you're likely to screw one up. Please note that you can also order ready-made M4 dampers at Waypoint, but I did not know that at the time, and they are not listed on their shop page. * a sheet of rubber or an old tyre inner tubing * A (stainless steel) brace which can fit the handle bars and the rubber at the thickest part. The standard Garmin mount brace is not long enough, I found a perfectly fitting brace sold as some drywall pipe mount (wandputting). * two stainless steel self-locking nuts fitting the brace, in my case M6. * 10x10 aluminum U profile rod, about 50mm length for the counter bracket on the brace * eight stainless steel M4x15 bolts, with at least four washers. * 2mm thick aluminum sheet, at least 53x80mm * at least 30x30mm wood beam, of about 1 meter in length * wood screws (trust me on these last two items) * small bottle of mild threadlock (I used loctite 243) * some WD40 (you should have that in your shop, next to the duct tape)
** Tools you need to have:**
  * sharp (new) 3.2mm HSS drill bit and preferably a bench-press drill
  * standard set of steel drill bits (1mm to 10mm, whatever you have handy)
  * sharp 15mm wood drill but (this needs to be exact)
  * M4 inner thread cutter
  * firmly attached [bench vise](http://en.wikipedia.org/wiki/Vise)
  * a set of [metal files](http://en.wikipedia.org/wiki/File_(tool))
  * a hacksaw
  * a wood saw
  * a freezer (or rent a small space in that for 24 hours :-)
  * an old blanket or towel
** Things you need to do:**
The rubber dampers in the harddisk stabilizer have the wrong hole in one end, and a piece of thread in the other. To be able to cut new M4 thread, we need to drill through the steel and the rubber. Drilling rubber is usually a problem, but not if we do some careful preparations.
 Take the 30x30 wood beam, and cut off four pieces of about 7 to 10 cm length. Drill a 15mm hole in each of them. Then, saw it in half with the wood saw. Be carefull to mark the wood pieces, as they need to fit perfectly back together later on. Drill two small holes in one half of the four clamps, so you can screw it back together perfectly, as if it was 1 piece.
Take the rubber dampers from the scythe harddisk stabilizer, put them in the 15mm holes and screw the clamps back together. With the hacksaw, saw off the thread coming out of one end of the damper, and file it so that the metal is perfectly flat.
Check that the rubber dampers fit the wooden clamps, screw them together pretty tight, and put the four (or eight) assemblies in the freezer for at least 24 hours.
To protect the paint on your gastank, put an old blanket or towel on it. This will keep you from scratching the tank in the next steps. Extra advantage is that you can put small nuts and washers on your tank without them rolling away.
 While waiting for the rubbers to cool off, you can prepare the aluminum parts. Take the 10x10 aluminum frame, and drill two holes in it so that the M6 brace fits through it. Mark the perfect middle between the two holes, and use a half-round steel file to file it down so that it fits the handlebars perfectly.
Be careful to file perpendicular to the aluminum, and re-check your work often. The U profile sits flush against the handlebars, while being perpendicular to them when looking from the riders position. Don't file too deep, allow for some room between the aluminum plate and the handlebars, so that the screw heads don't touch the bars.
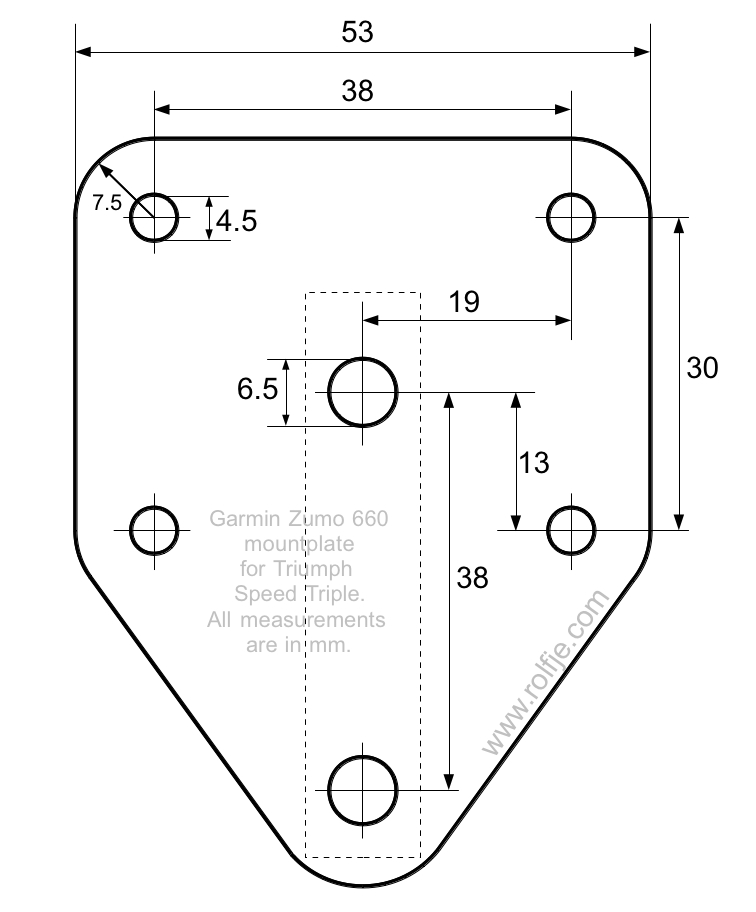
Next, take the aluminum sheet and make it look like the drawing I made here (this is the shortest sentence in this post, resulting in the most work for the reader).
Prepare the benchpress drill by mounting the 3.2mm drill bit. After the rubber dampers in the wood clamps have been in the freezer, take one out and take it to the workshop as fast as you can, make sure to keep it cold.
On the flat side of the rubber damper (the side where you filed off the thread), drill a hole through the steel, but try not to drill into the rubber too much.
Flip the clamp over, and drill through the original threaded hole, all the way through the rubber. If your benchpress drill is straight, you should come out through the hole you just drilled in the in the other steel plate.
Repeat the whole process for each damper. Minimize the time they are out of the freezer. After you've drilled all dampers, they can warm up again by leaving them in the workshop.
Take the dampers out of the wooden clamps. You don't need the clamps anymore, give them to a friend so he can make this cool mount, too.
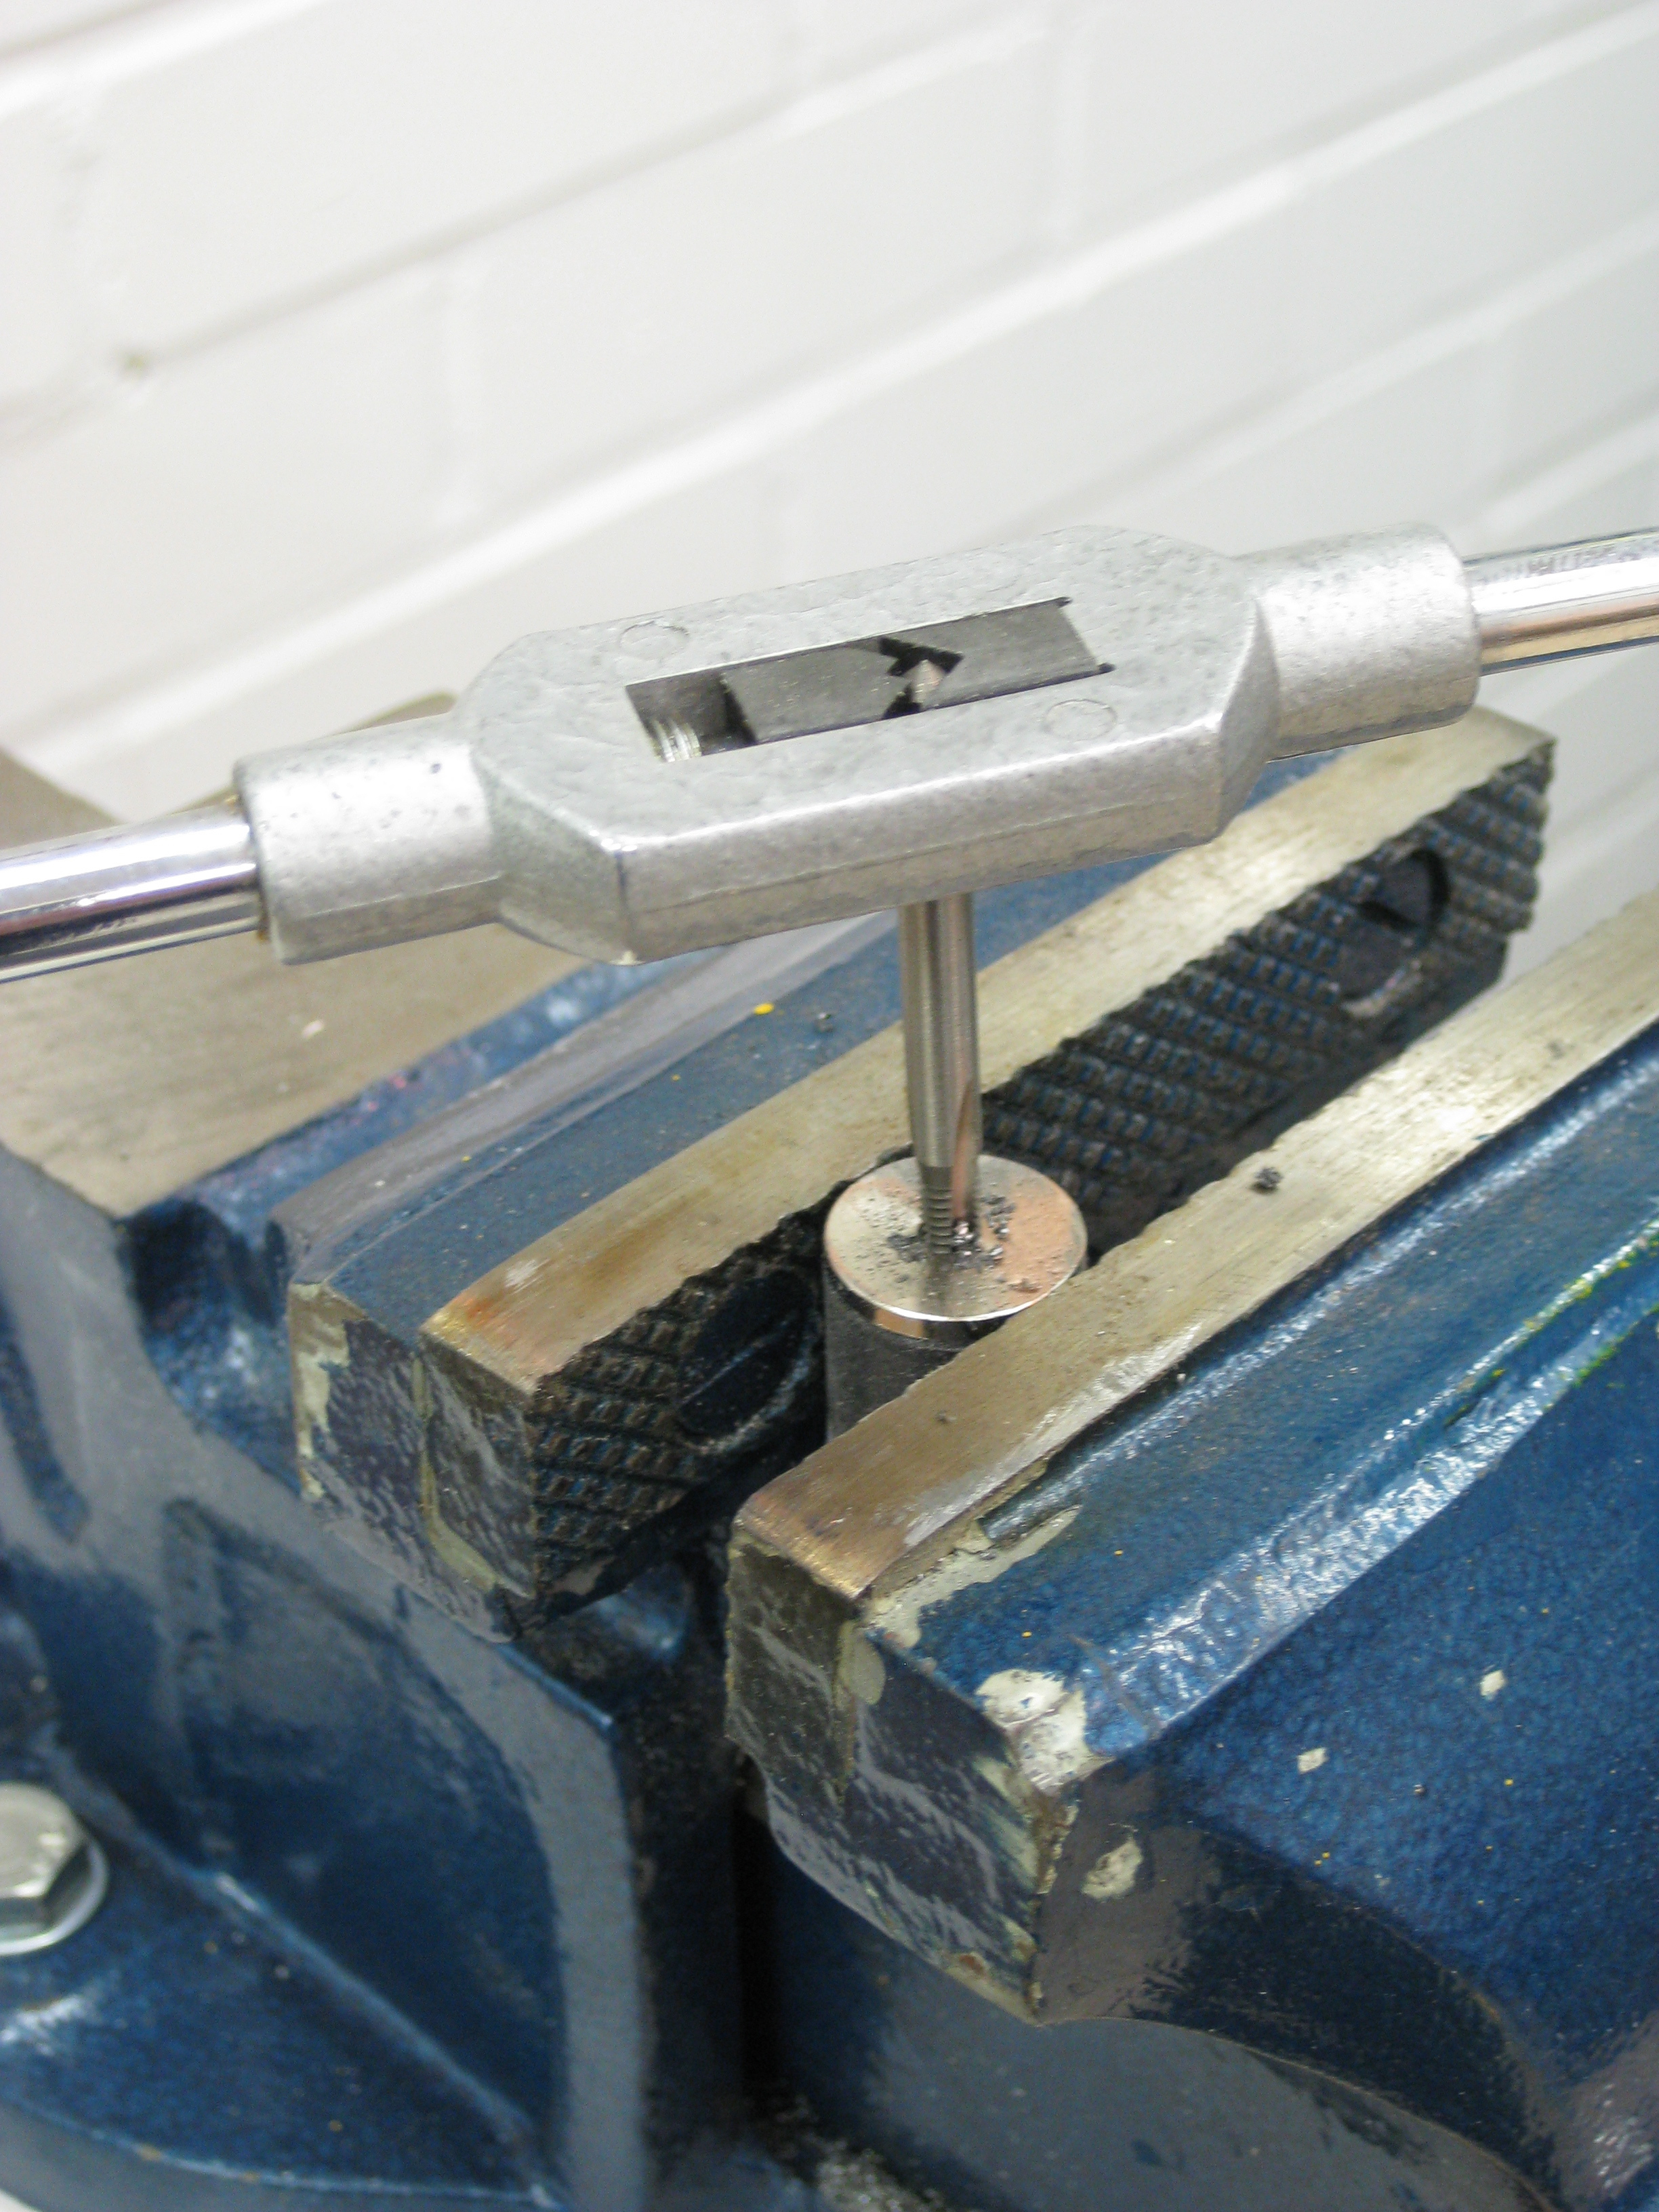
Put one of the rubber dampers in the bench vise and use a small drop of WD40 and the M4 thread cutter to cut thread into the 3.2mm holes. Do this on both sides, make sure that you break the cuttings (one turn forward, then 2/3 back, repeat). Repeat this for all dampers.
Mount up! You should now have all pieces to mount. Test the fitting of the mount before you use threadlock (loctite) on any of the parts. Because of the construction, there is an order in which you need to assemble the parts, let me take you through it:
 Mount the rubbers on the zūmo mount, but do not fasten the screws. Attach the aluminum plate to the other side, also not fastening the screws.
Now, tighten the screws on the zumo mount first, then tighten the screws on the aluminim plate. This will make sure that the dampers will align perfectly later on. Take one screw out of the aluminum plate, apply threadlock and a washer, and re-tighten it. Repeat for the other three screws in the aluminum plate.
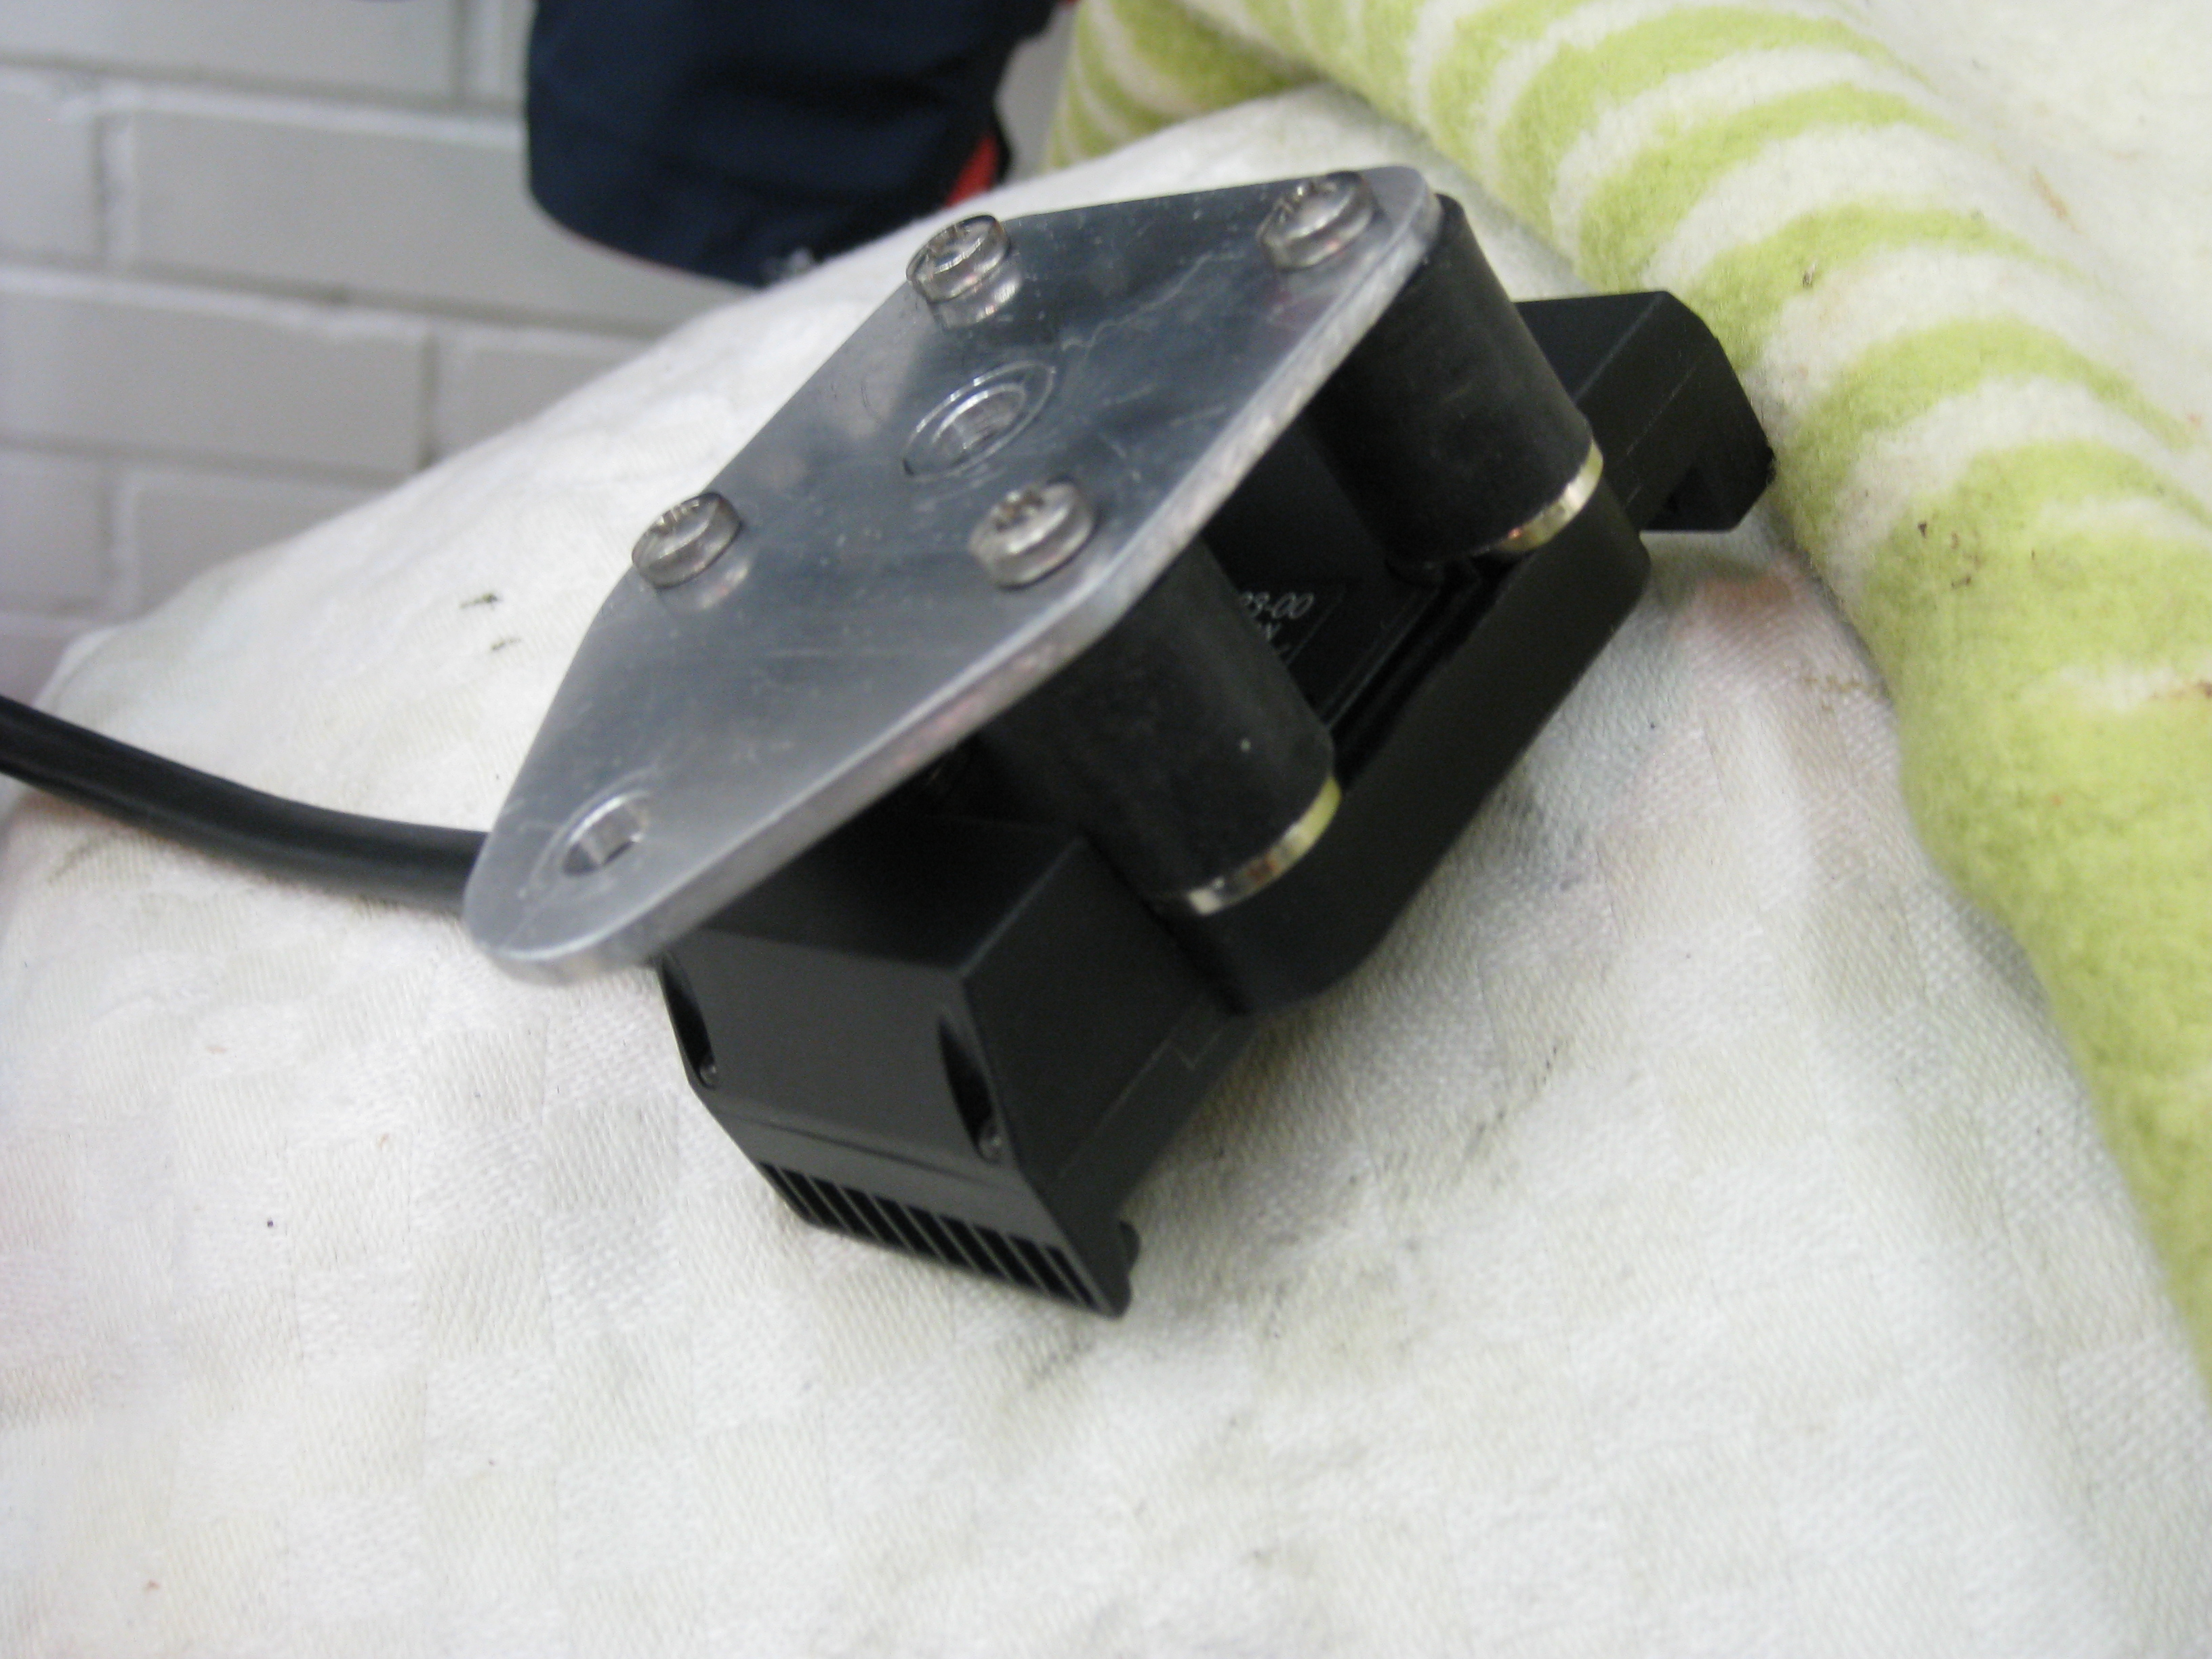
After you've done all four screws attaching the dampers to the aluminum plate, take the Garmin zūmo mount off. You should now have an aluminum plate with four dampers firmly attached to it.
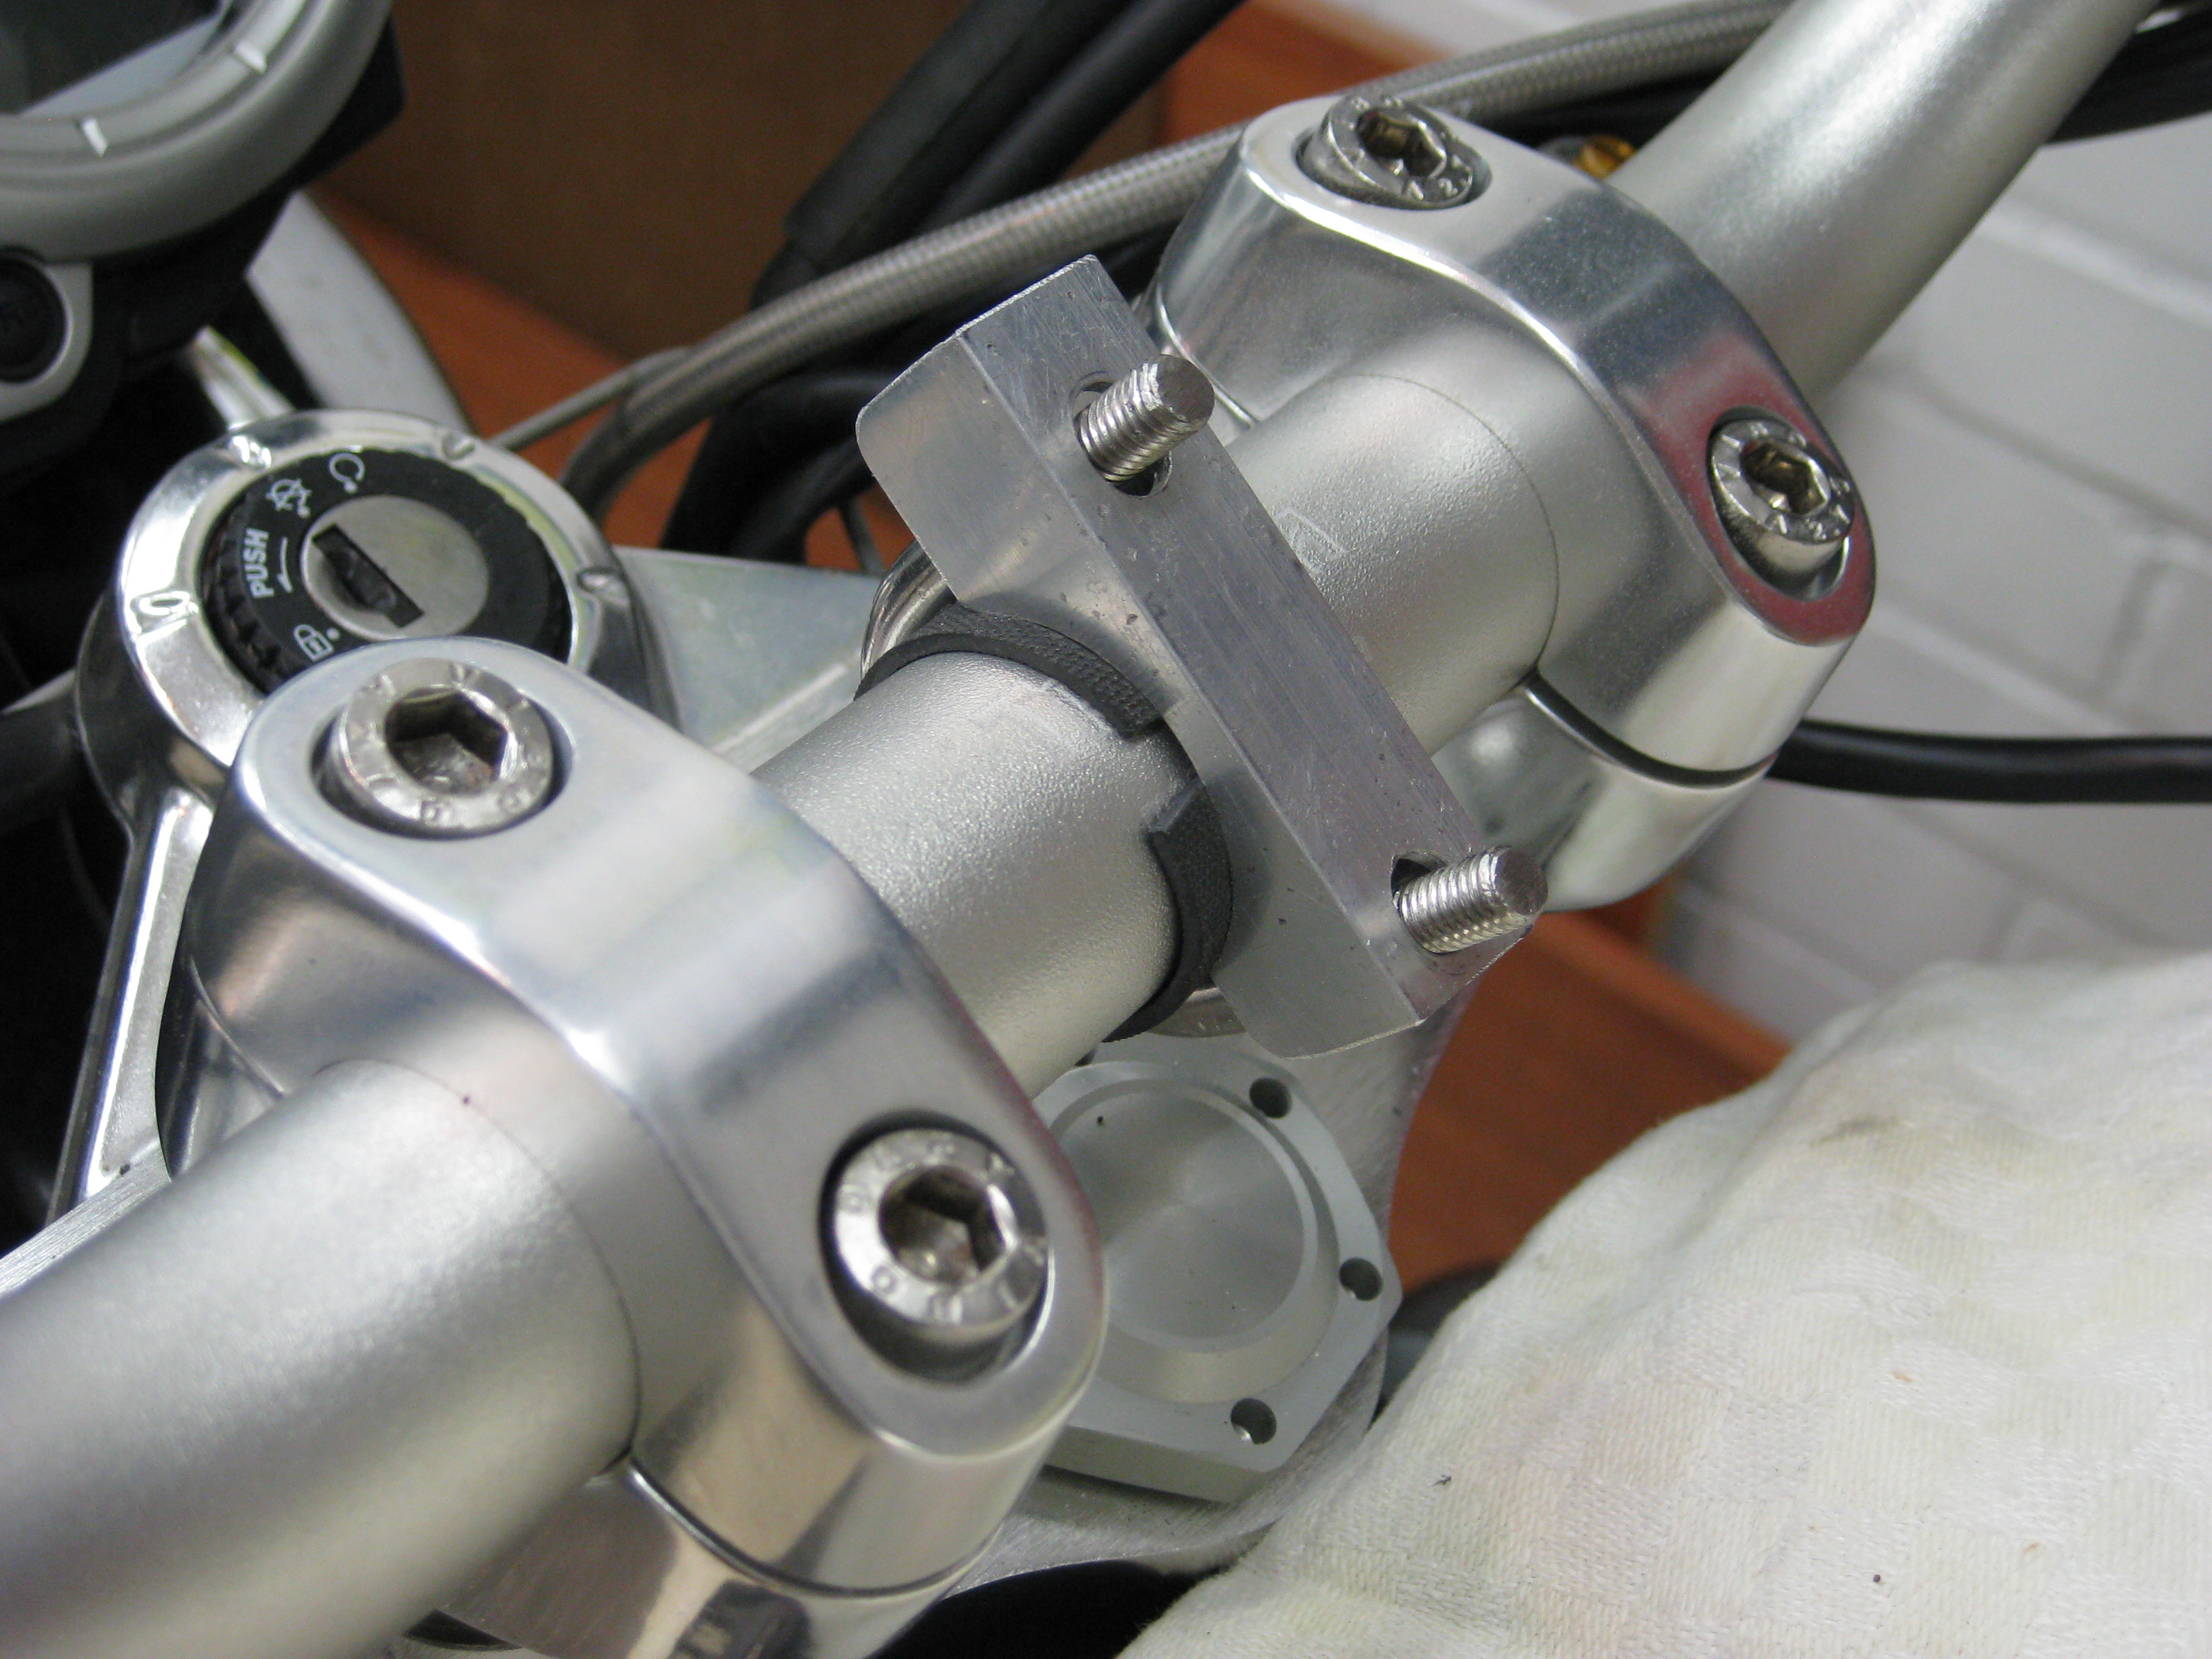
 Cut the rubber slab to the correct width and length so that it protects your handlebars from scratches by the mount. Use the brace, the aluminum U profile, two washers and two self-locking nuts to attach the aluminum plate to the handlebars.
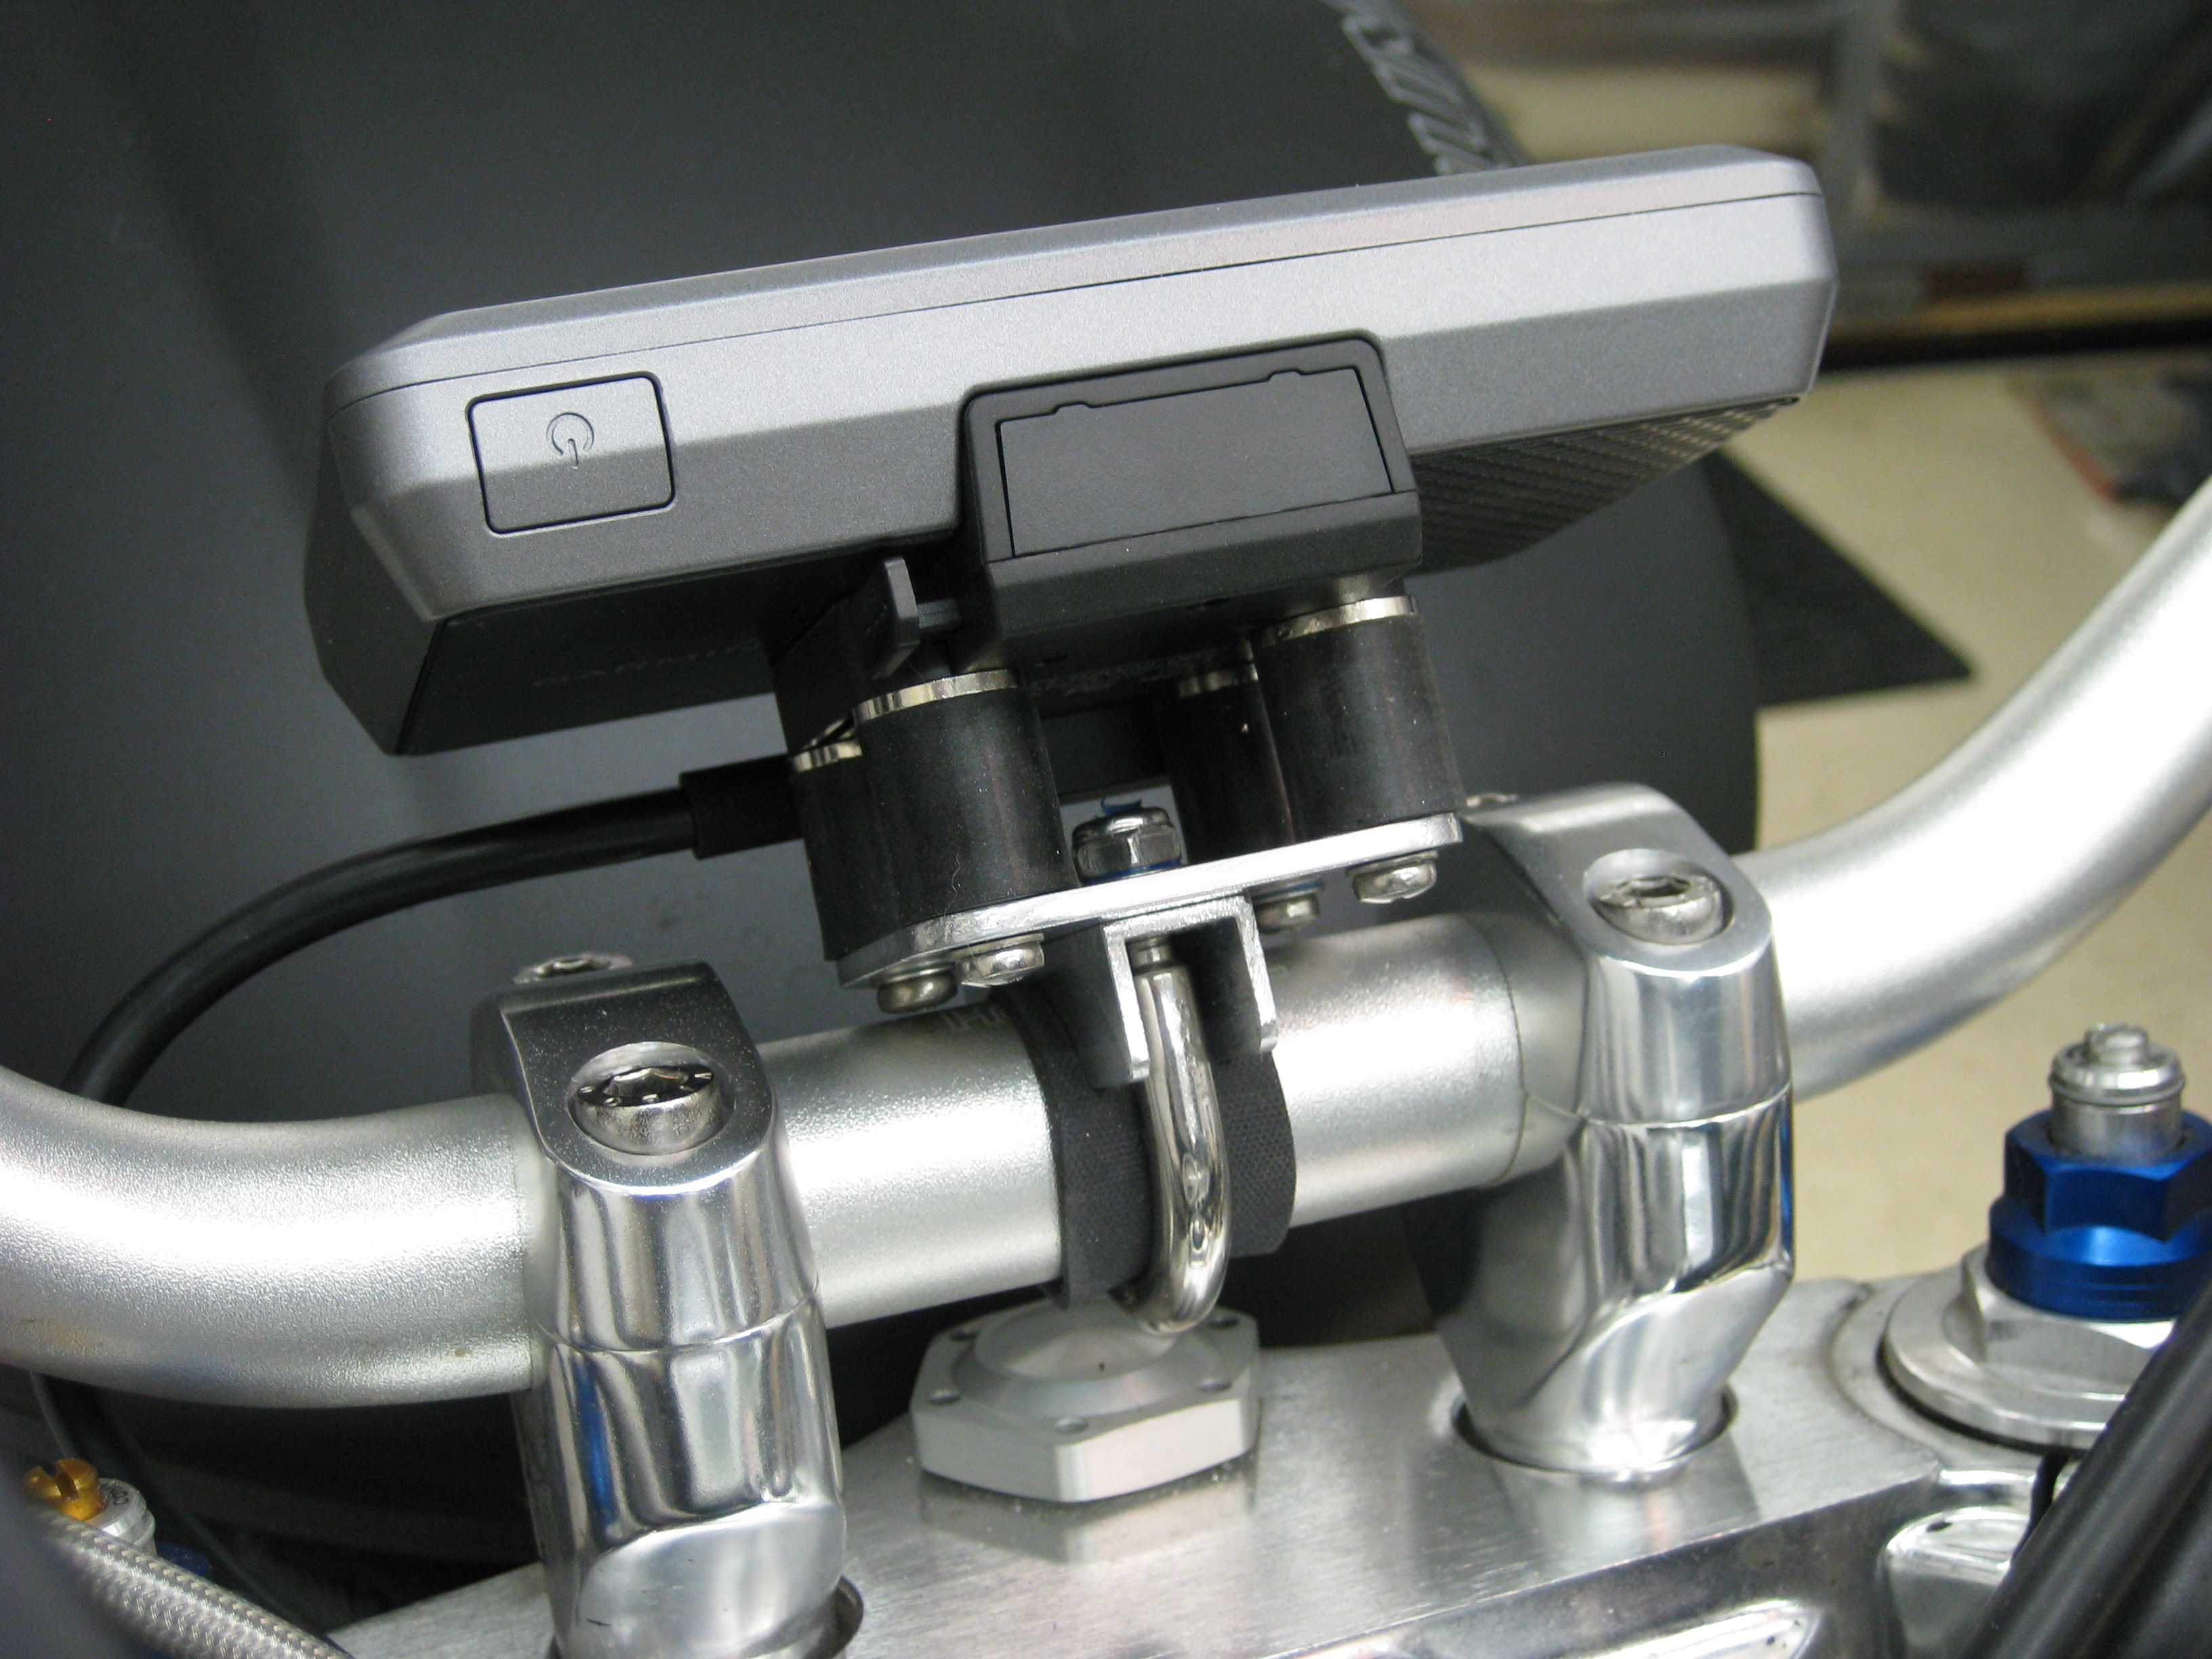
When compfortable with the position, tighten the bolts and attach the zūmo mount to the rubber dampers, using threadlock. Everything should match up perfectly, don't force anything.
And there you have it, all done! More pictures of the whole process are available here.
Please note: At the time of writing I did not thouroghly test the durability and strength of this mount and it's dampers. Mounting the zūmo like this is totally at your own risk, so please be careful. If you're not sure about the dampers, buy ready-made ones fit for this purpose. Your GPS supplier should be able to get a hold of a set.