Move Time Machine data to a Drobo
 If Santa treated you particularly well this season, or you have put some of your savings to good use, chances are that you have a brand-new Drobo looking at you right now. Meanwhile, your Mac is happily making Time Machine backups to that trusty old local USB disk. So you want to use that new Drobo for Time Machine backups, but don't want to loose history? Here's how (baby steps, no tools required, screenshots included):
1. Connect the Drobo (in my case a Drobo FS) to the network and configure an Administrator password for it. You should now have a working Drobo, with at least 2 drives in it, and it shares a "Public" share on the network.
2. Make sure that the free space reported by the Drobo Dashboard is at least as big as your old USB Time Machine drive. Add drives to the Drobo as needed.
3. In the Drobo Dashboard, click on "Advanced Controls", go to the "Tools" tab, click on "Settings..." and then select the "Shares" tab.
4. Create a new user for your Time Machine backup. It's important to create a non-admin user to keep your data safe. Trust me, you'll thank me later.
5. Create a new Drobo share (the "+" on the bottom left), give it a meaningful name and select "Enable Time Machine on this drive". Be careful in choosing the size, you can't change this later!
6. Remove "Everyone" from the allowed users for this share (the "-" bottom right) and add the user you just created (the "+" on the bottom right). You should now have something like this:[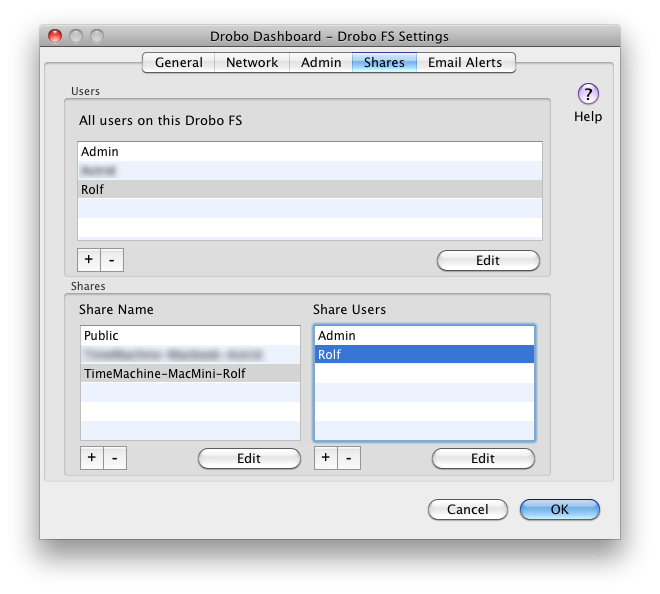
](schermafbeelding-2010-12-28-om-20-03-55.png)
7. Close Drobo Dashboard, we won't be needing it anymore.
8. Open System Preferences on your Mac, and select "Time Machine"
9. Click on the "Select Disk" option. Don't worry, we're not damaging or loosing your existing backup by doing this.
10. In the popup, you'll see your newly created Time Machine share on the Drobo. Select this share and fill in the Userid and Password you just created on the Drobo.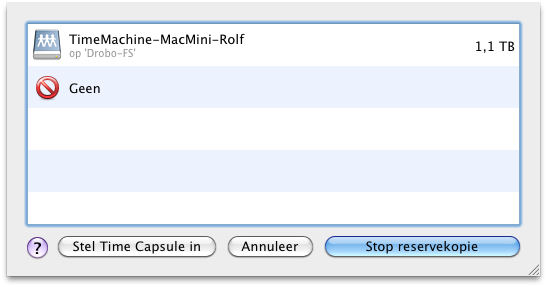 11. Wait for Time Machine to start, or force it by using the "Backup now" menu option. Time Machine will first try to create a sparse bundle and calculate what to back up. As soon as you see the backup starting (the "zebra" stripes turn into a normal progress bar), click on the cancel button. We only used Time Machine to create a sparse bundle with the correct settings.
12. In System Preferences, switch Time Machine off.
13. Go to the Drobo Time Machine share you just created and mount the sparse bundle you see there.
14. Open Disk Utility and select the USB Time Machine disk.
15. Click on "Restore" and drag the partition of the old USB Time Machine drive to the "Source" box. Drag the partition on the mounted Drobo Time Machine disk to the "Destination" box. Double check my screen shot, it's important to get this right. Drag the partitions, not the disks itself. If you're not able to drag the disks as described, you may want to unmount your old Time Machine drive, remount it, and restart Disk Utility.
11. Wait for Time Machine to start, or force it by using the "Backup now" menu option. Time Machine will first try to create a sparse bundle and calculate what to back up. As soon as you see the backup starting (the "zebra" stripes turn into a normal progress bar), click on the cancel button. We only used Time Machine to create a sparse bundle with the correct settings.
12. In System Preferences, switch Time Machine off.
13. Go to the Drobo Time Machine share you just created and mount the sparse bundle you see there.
14. Open Disk Utility and select the USB Time Machine disk.
15. Click on "Restore" and drag the partition of the old USB Time Machine drive to the "Source" box. Drag the partition on the mounted Drobo Time Machine disk to the "Destination" box. Double check my screen shot, it's important to get this right. Drag the partitions, not the disks itself. If you're not able to drag the disks as described, you may want to unmount your old Time Machine drive, remount it, and restart Disk Utility.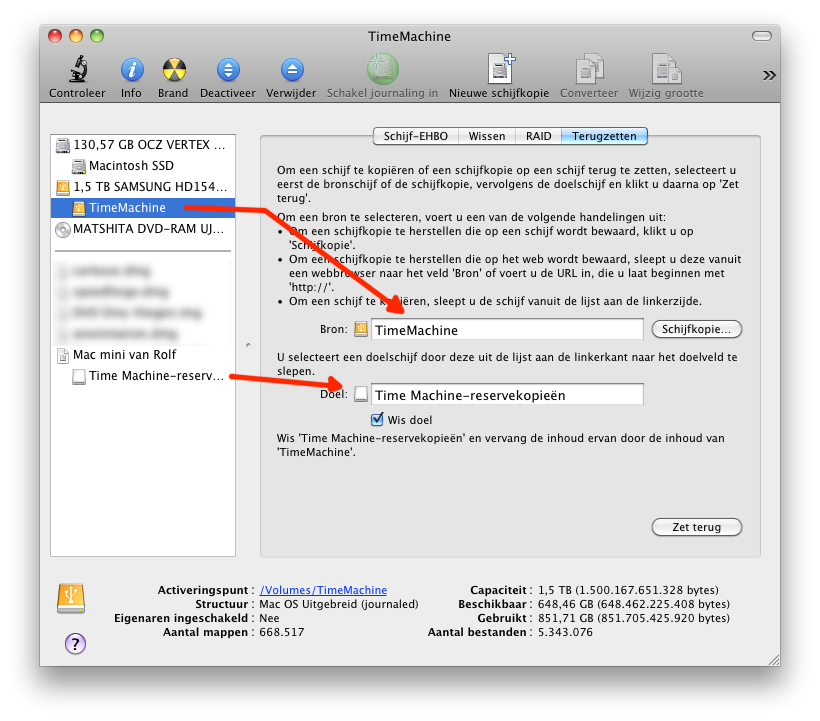 16. Make sure "Erase Target" is selected and press "Restore". Disk Utility may ask for your password.
17. Prepare for a long wait. If you have more than a 500GB backup drive, you wish you had invested in Gigabit Ethernet right now (yes that speeds it up tremendously). My restore of 800GB over a 100Mb network took more than 2 days.
18. Once the process is finished, do not forget to switch Time Machine back on in the System Preferences.
16. Make sure "Erase Target" is selected and press "Restore". Disk Utility may ask for your password.
17. Prepare for a long wait. If you have more than a 500GB backup drive, you wish you had invested in Gigabit Ethernet right now (yes that speeds it up tremendously). My restore of 800GB over a 100Mb network took more than 2 days.
18. Once the process is finished, do not forget to switch Time Machine back on in the System Preferences.
That's it. Time Machine will automatically mount the Drobo Share if needed. The first backup will take a bit more time, I think Apple built in a file check to see if the backup is still ok after moving it to another disk.
Tip 1: Keep your old USB Time Machine disk next to the Drobo, even if you have an empty slot. By doing this, you can instantly replace a faulty drive without running to the store. Always keep a spare!
Tip 2: Storing data on your Drobo, and then backing up to a Time Machine bundle on that same Drobo is not a backup. A file is only safe if it is stored in 3 different physical locations, one of which is preferably off-site.
Happy Drobo days!