How to fix a Krups XN2001 Nespresso machine
 Maybe the title of this post should read "how to open a Krups XN2001 Nespresso machine". The Krups XN2001 is almost identical to the newer XN2002 and XN2003. While the XN2003 has normal Torx screws, Krups was a bit more "protective" when they built the XN2001. It has screws that can not be gripped by any screwdriver. Still, there is an easy trick you can use to get headless screws out of any machine.
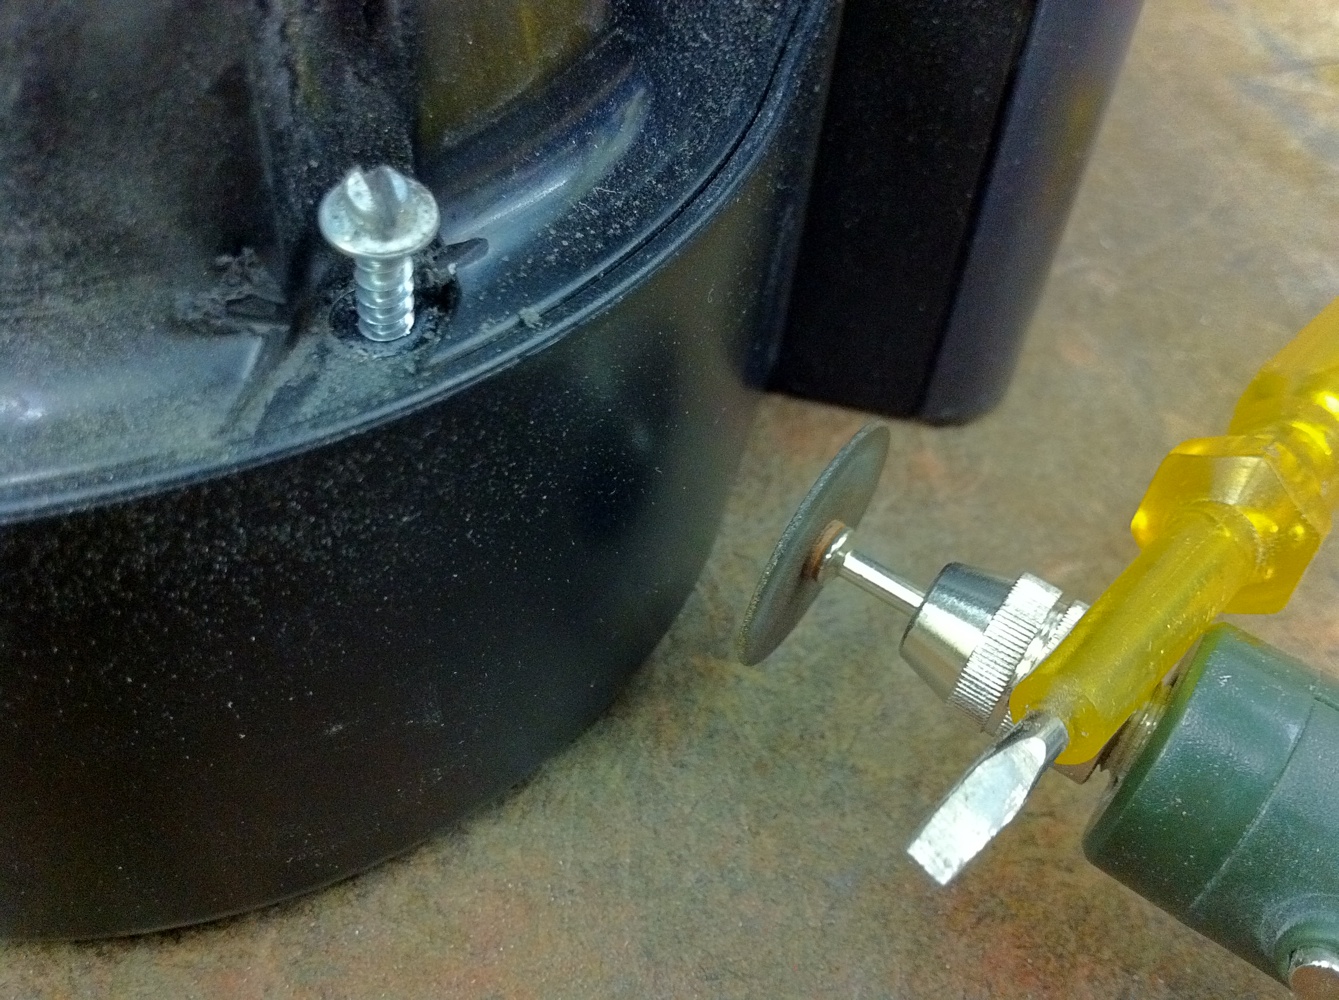
When I tried to open the Krups XN2001, I noticed these funny looking screws, which looked more like nails. After I discovered that these were actually normal screws, I needed to figure out how to get to the ones at the bottom.
| [ ](img_2180.jpg) | [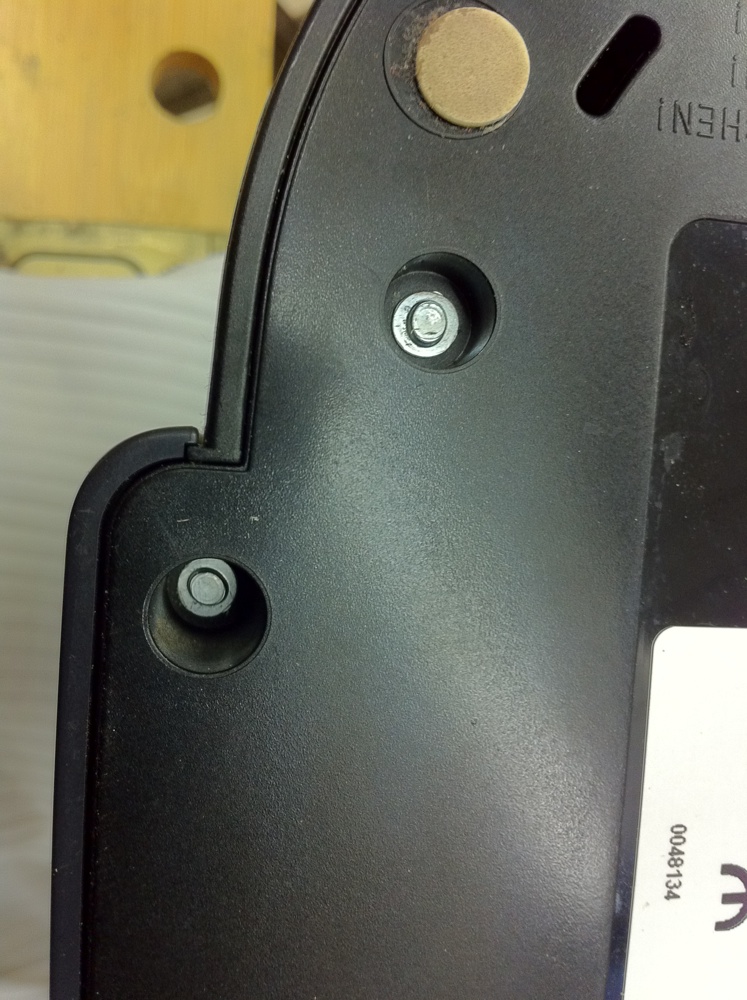 ](img_2181.jpg) |
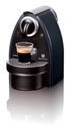
A few laughs and a short discussion later, it turned out that they did not have tools that would fit or grip the headless screws. I went into "MacGyver mode" and got an aluminum rod that fit nicely on top of the screw head without touching the plastics of the case, and grabbed a tube of industrial strength superglue.
At home, I cut the rod into a few shorter bushings, and used the lathe to make them nice and flat. I carved a slot on the other end of each bushing with a dremel tool. Then, I carefully superglued the bushings onto the screws without touching the plastic, and let them settle for a few minutes.
| [ ](img_2183.jpg) | [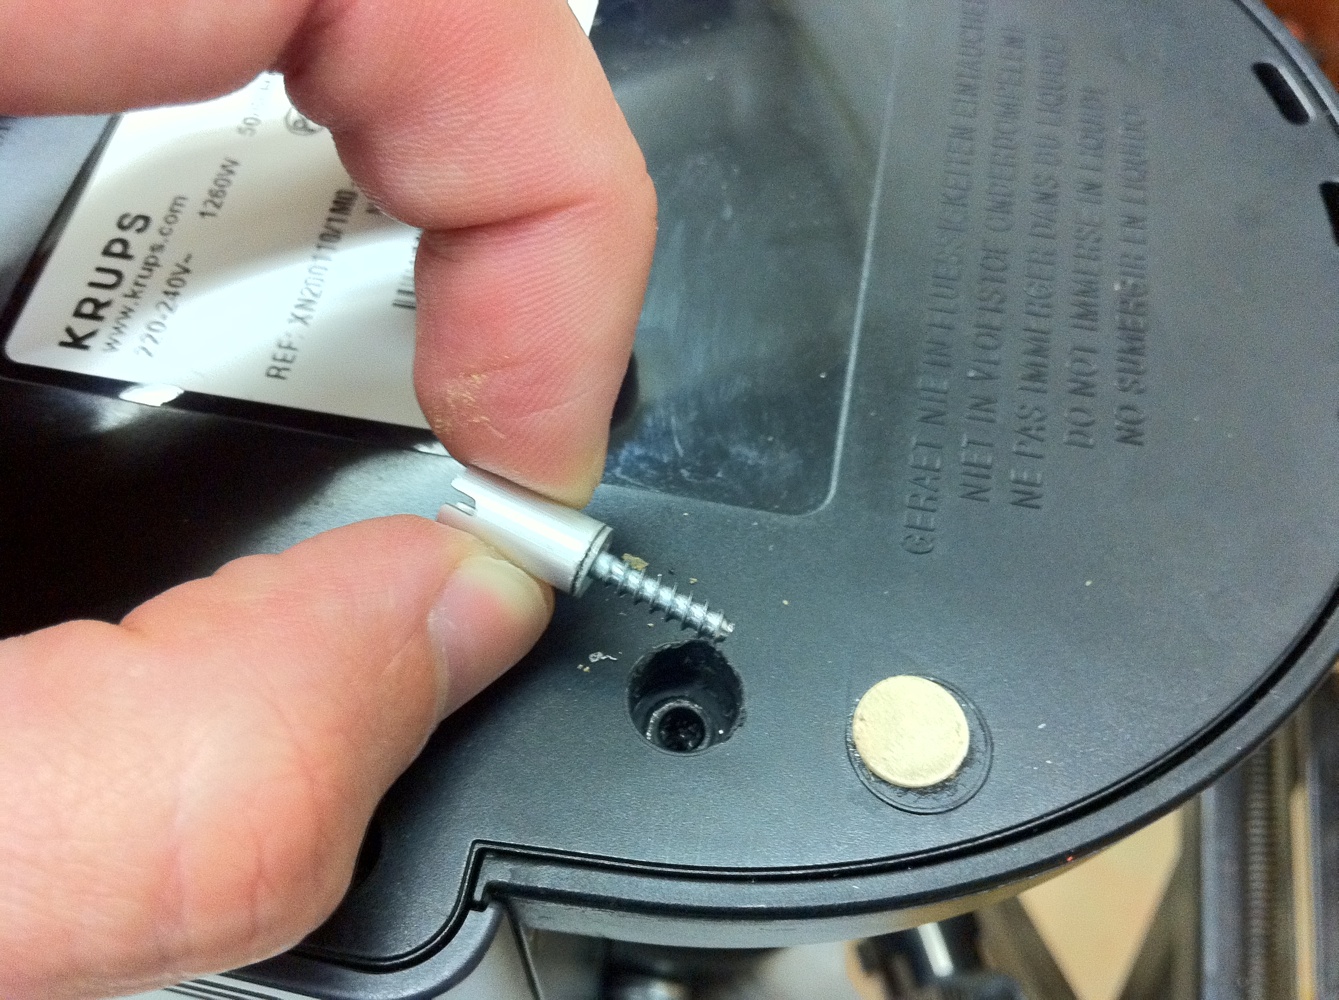 ](img_2187.jpg) |
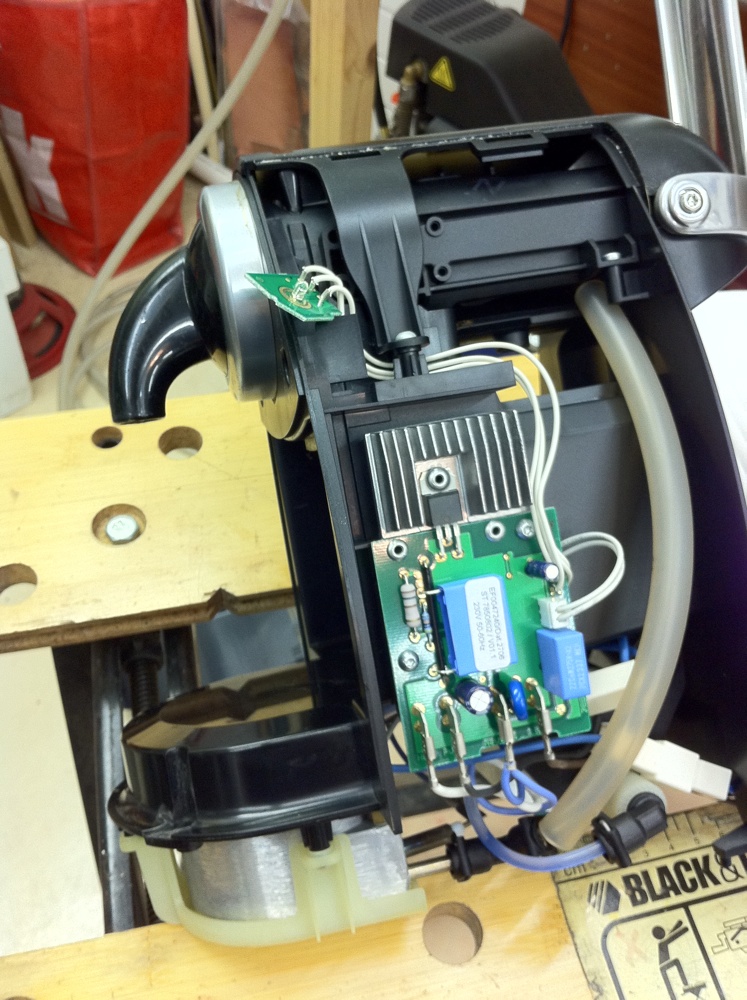
Once you open it, you can see how simple this machine is. There's not much that can break, and parts look like they can be easily replaced. Instead of just cleaning the contacts in the button, I decided to go a little further and replaced the existing ones. I had to cut away some placeholders for the old pushbuttons, and drill a hole to hold the green led which tells you what the machine is doing.
| [ ](img_2191.jpg) | [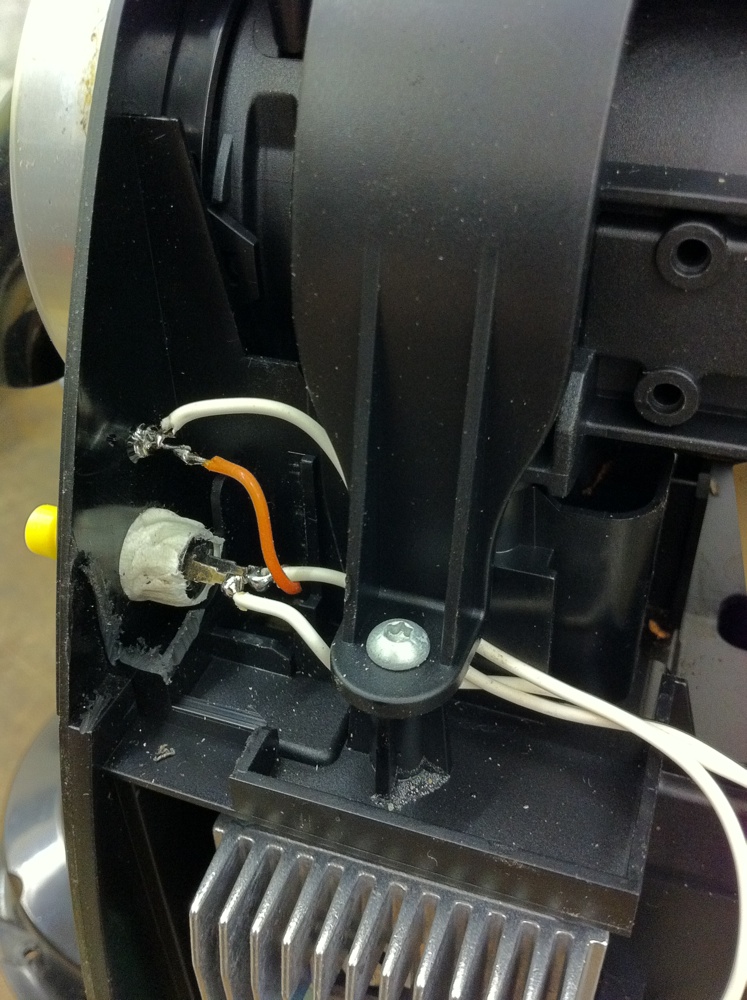 ](img_2195.jpg) | [ ](img_2205.jpg) |